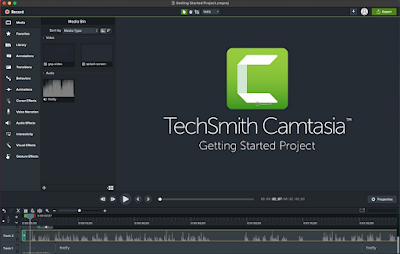
Camtasia Software is a powerful, yet easy-to-use screen recorder and video editor. Camtasia makes it simple to record and create professional-looking videos on Windows and Mac. Camtasia’s intuitive interface makes it easy to get started quickly – even if you’ve never edited a video before. Simply record your screen and add a few effects. Camtasia will do the rest!
Camtasia is perfect for creating tutorial videos, product demonstrations, training videos, marketing videos, and more! Not only is Camtasia great for creating videos, but it’s also super easy to share them. You can export your videos in various formats (including MP4, WMV, and AVI), or upload them directly to YouTube, Vimeo, or Google Drive. Camtasia even has built-in sharing options for popular social media sites like Facebook and Twitter.
Camtasia is a video editing and screen recording software that allows you to create professional-quality videos. Here is a general outline of how to edit and render videos in Camtasia:
- Import your video clips and audio files into Camtasia. You can do this by dragging and dropping the files into the media bin, or by using the "Import Media" button in the toolbar.
- Arrange your clips in the timeline by dragging and dropping them into place. You can trim clips, split them, and add transitions between them to create a polished video.
- Use the various tools and features in Camtasia to edit your video. You can add captions, annotations, callouts, and other elements to enhance your video.
- Preview your video to make sure everything looks and sounds the way you want it to.
- When you're ready to render your video, go to the "Produce and Share" tab and choose the output format you want. You can create a video file, an HTML5 video, or a video that can be uploaded to YouTube or Vimeo.
- Click the "Produce" button to start the rendering process. This may take some time, depending on the length and complexity of your video.
- When the rendering is complete, you can find your rendered video in the location you specified. You can then share it with others or upload it to the web.
How to Edit and Render Videos in Camtasia Software:
Editing videos can be a daunting task, but with Camtasia it's easy. Here's a quick guide on how to edit and render videos in Camtasia.
1. How to Edit
Step one is to launch Camtasia and import your video file. Once the file is imported, you'll see the editing interface.
To trim your video, simply click and drag the beginning or end of the clip. You can also use the split tool to cut your video into multiple sections.
To add effects, transitions, or annotations, simply drag and drop them into the timeline. Camtasia has a wide range of built-in effects that you can use to enhance your video.
2. How to Render
Once you're happy with your edited video, it's time to render it. Rendering is the process of exporting your video for playback.
To render your video, click the "Produce and Share" button in the Camtasia interface. From there, you'll be able to select your desired output format and resolution. Camtasia supports a wide range of formats, so you can export your video for any purpose.
Once you've selected your settings, click "Create" to start the rendering process. Camtasia will export your video and then provide you with a link to view it online.

